A group is a collection of rights. By bundling rights together like this, you can manage the permissions of many users a lot more efficiently. For example, users with the function of administrator should have almost every right available to them. Other groups, like your customers for example, may be more restricted.
Create new group
Follow these steps to create a new group:
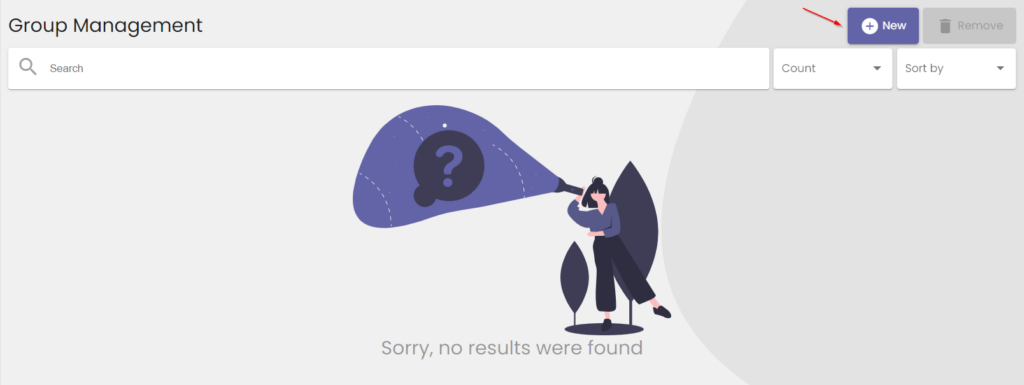
- Open the User management tab in the menu on the left
- Click the Groups button.
- Click the New button as shown in the image below.
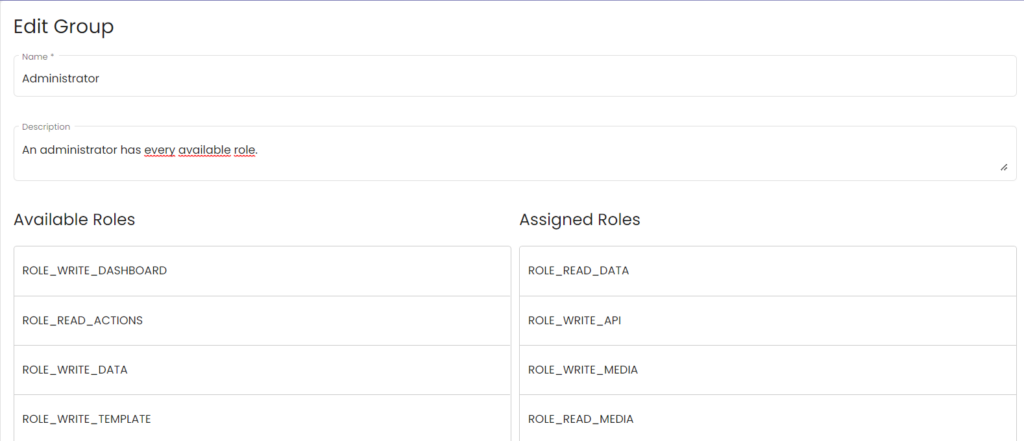
- Choose a name and a description for this group. In the example above, an appropriate name would be Administrator.
- Click Save.
- The new group appears in the group list. Click its name to add rights to it. An example is shown in the second image below. If we adhere to the description of the administrator group, every available right should be moved to the list of assigned rights.
- Press Save at the bottom of the page.
Then follow the steps in the Users article to assign a group to users.