Not all pages are meant to be accessible to everyone. However, no authorization rules are in effect by default. This article explains how to add authorization to your templates.
Add authorization requirements to templates
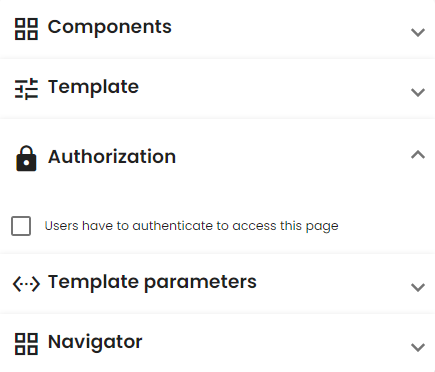
You can manage who is allowed to enter a page (corresponding with a template) in the Authorization tab in the menu on the right. This is shown in the image below. If you only want authenticated users to access the page, check the box Users have to authenticate to access this page. Now follow the steps below to configure additional authorization restrictions.
- Click the Add authorization rule button.
- A new rule Unnamed authorization rule appears. Click the pen icon next to it to configure it.
- Choose a relevant name for the rule in the Filter field.
- You can now select which groups and rights should have access to this page. Refer to the User management section for more information. An example is shown in the image below.
- The rule is shown in the list with the chosen name. You can delete rules by clicking the X icon next to the pen icon.
- Repeat this procedure to add as many authorization rules as necessary.
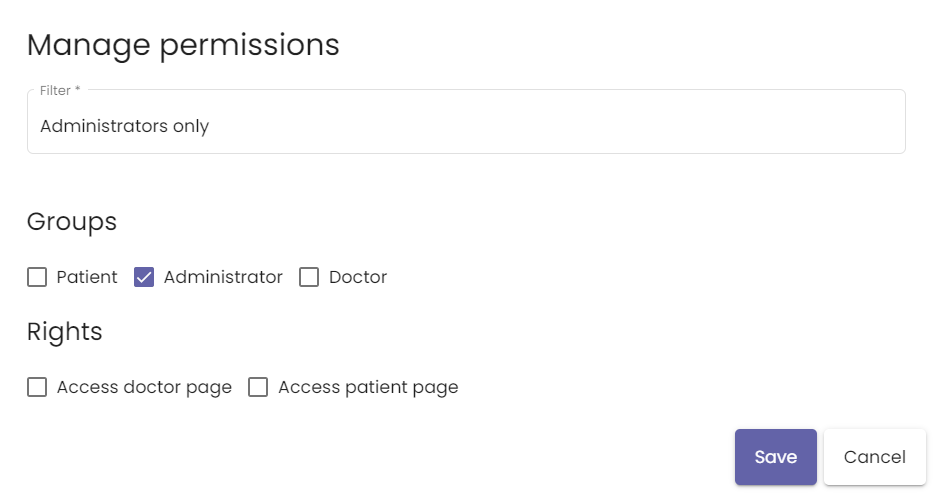
The image below shows an example for a page that only administrators may access.

