In this series we will learn how to build a restaurant reviewing application using the NoCode-X platform. Our application will allow users to add new restaurants and leave ratings and comments about them. In the first part we created a page that allows users to add restaurants. In this part we will allow users to add images to those restaurants.
If you have missed previous tutorials in this series, be sure to check them out:
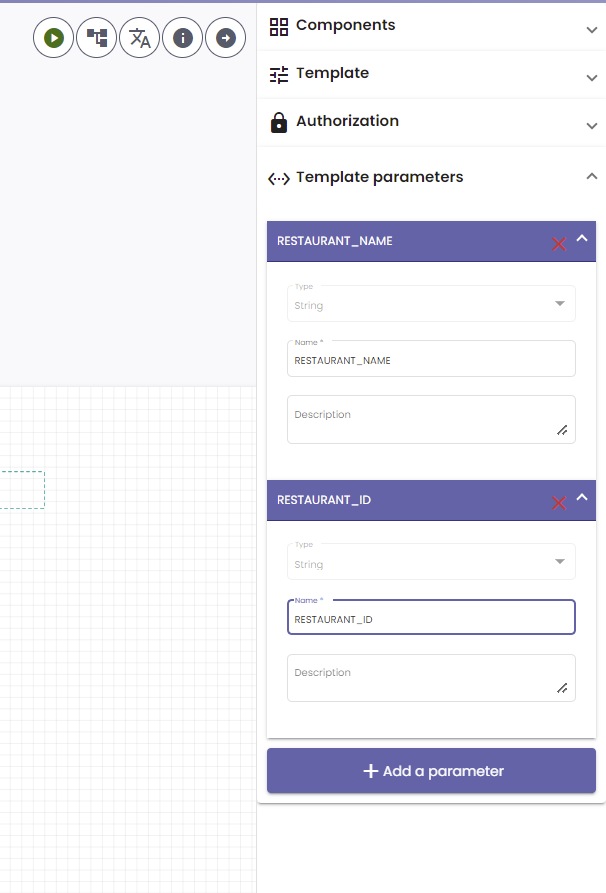
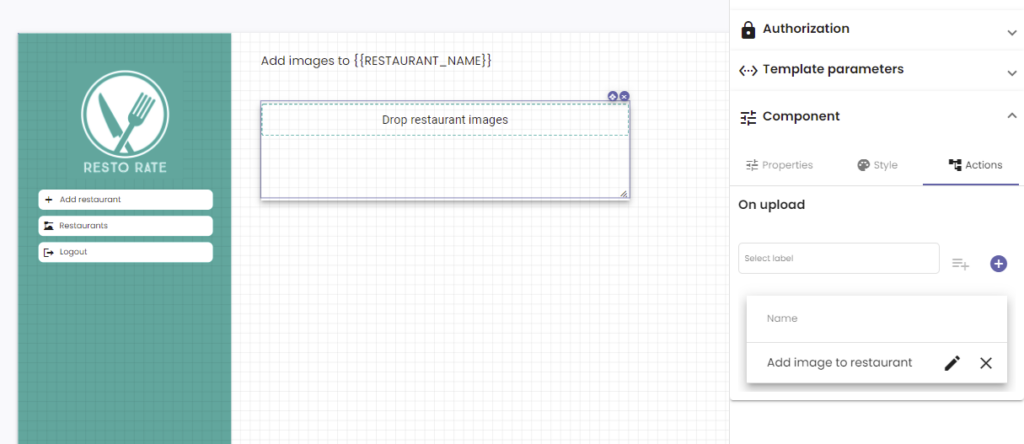
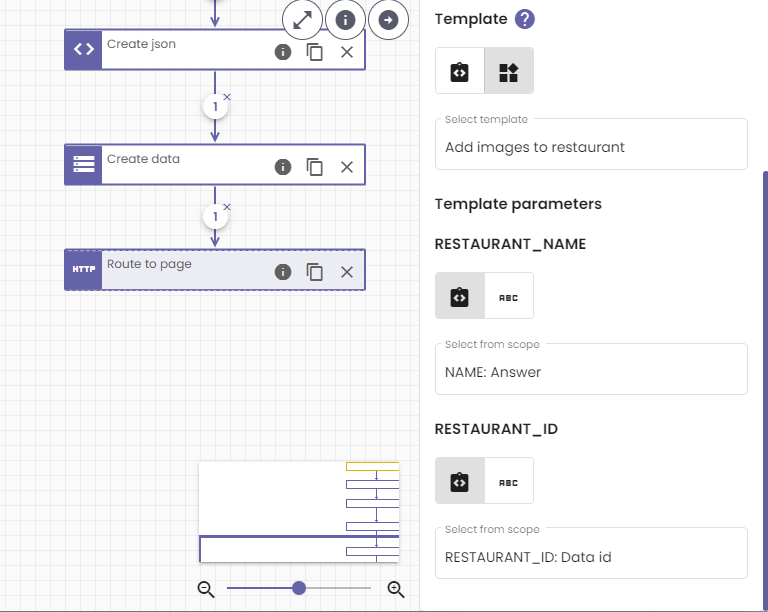
As a first step we want to build a page that allows our users to upload images. For this we will create a new template based on the “Master backoffice” template exactly as we did in the previous tutorial on creating restaurants in your restaurant reviewing app without writing code. We end up with a template containing the sidenavigation and logo. Every action on this page will be with regards to a restaurant. For this to work every action will have to know for which restaurant it has to be executed. To achieve this we can accept “parameters” on templates. We define “RESTAURANT_NAME” & “RESTAURANT_ID” as template parameters.
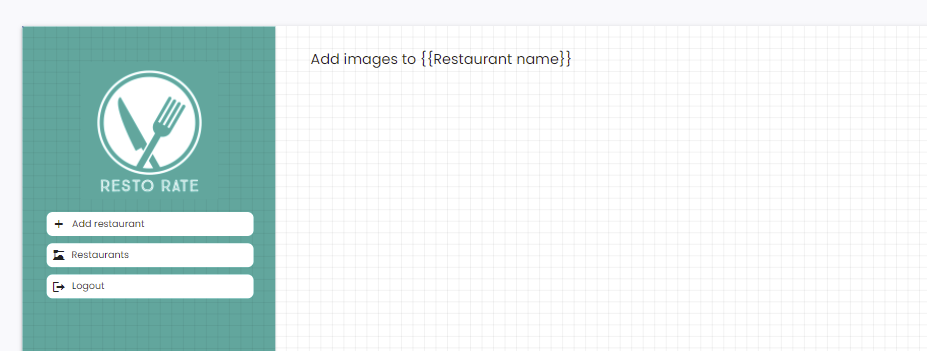
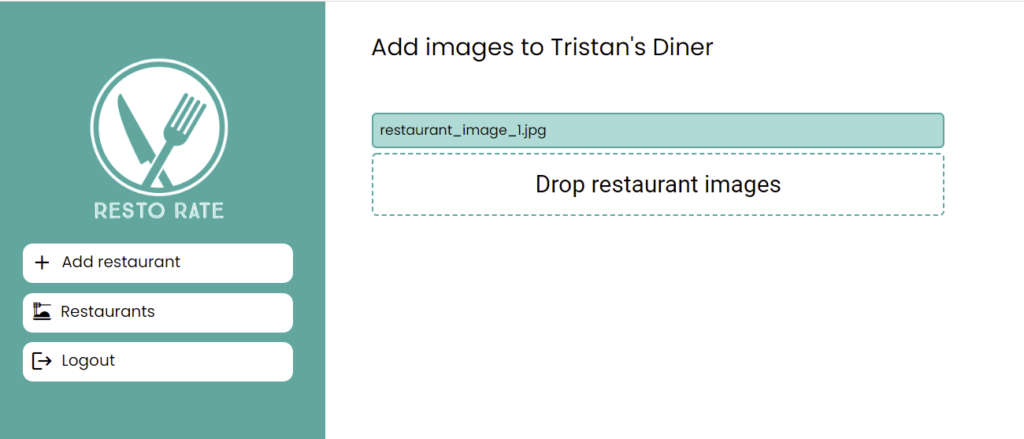
We can now add a title component with the text “Add images to {{RESTAURANT_NAME}}”. For components that contain text, all text within double curly brackets is replaced by the value of parameters of templates. For example if the parameter RESTAURANT_NAME would equal “Tristan’s diner” the actual text displayed on this page would be “Add images to Tristan’s diner”.
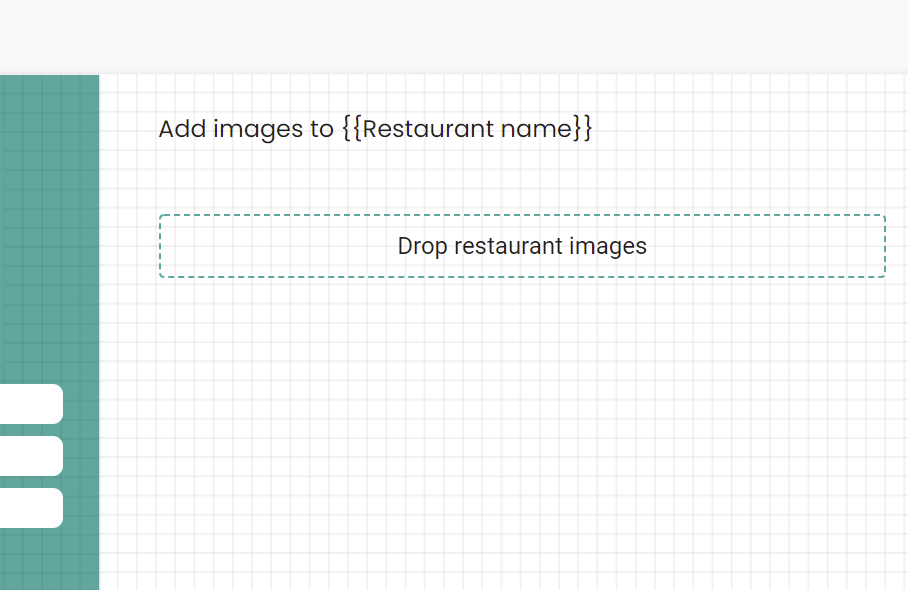
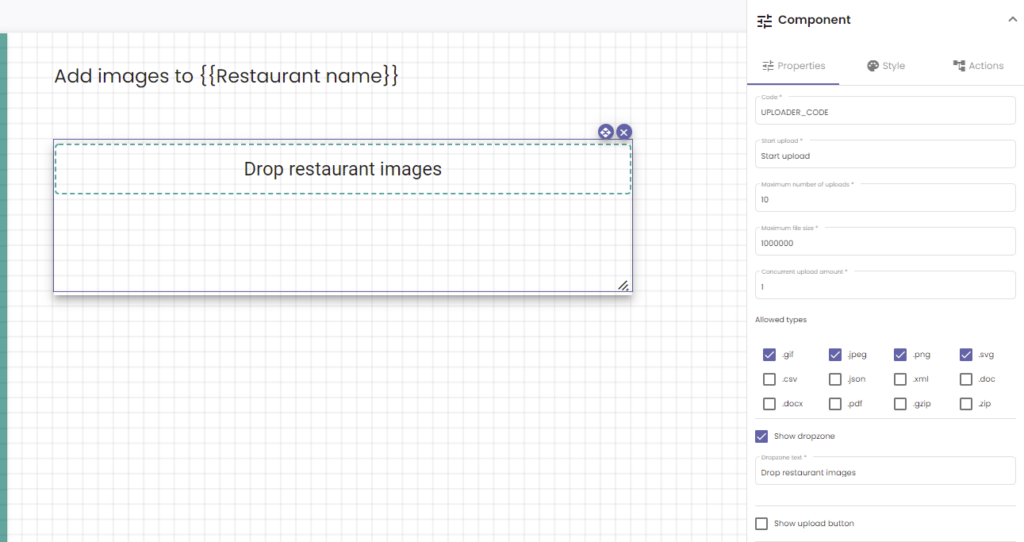
After this we can add an uploader component, and style according to wish. For this tutorial we hid everything except the actual files & the dropzone. We also added a border to the dropzone and added an effect whenever a file is being hovered over this dropzone.
Of course we cannot allow just any file to be uploaded to our media library. We want our nocode application to be secure and robust, thats why we impose the following restrictions with regards to files uploaded using the uploader component:
Uploading the images to your media library
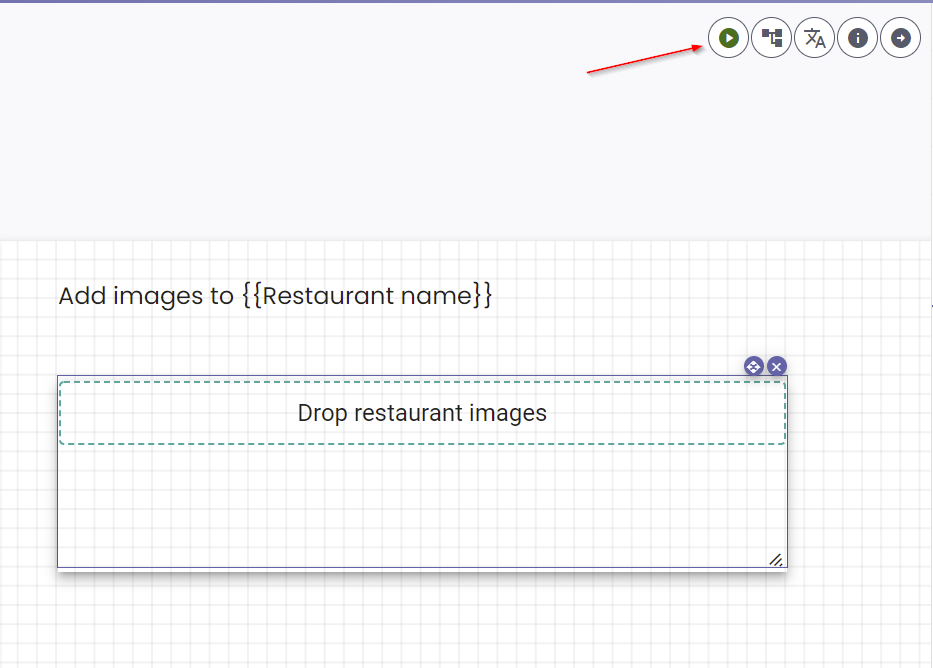
Your all set for uploading images straight into your media library. You can preview the page on your development environment by clicking the preview button
This will open the following page in which you can see that all components are in place.
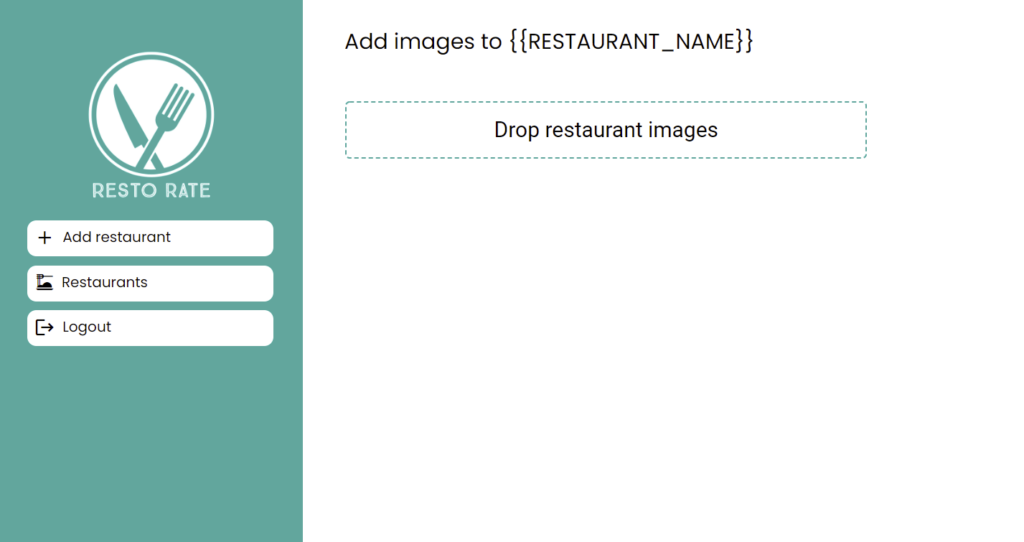
However the placeholder we have put in the title is not replaced by an actual value. No worries! That’s perfectly normal, this is simply because we did not provide a value for our “RESTAURANT_NAME” parameter yet. You can do this in several ways, for now lets just add a parameter to the url of the page, like so:
Remember whenever we add parameters to the url prefix the first parameter with “?”, this will indicate the browser that from that point on the url contains parameters. All the following parameters should be prefixed with “&” to seperate them.
Go ahead try and drop an image on the dropzone and see what happens!
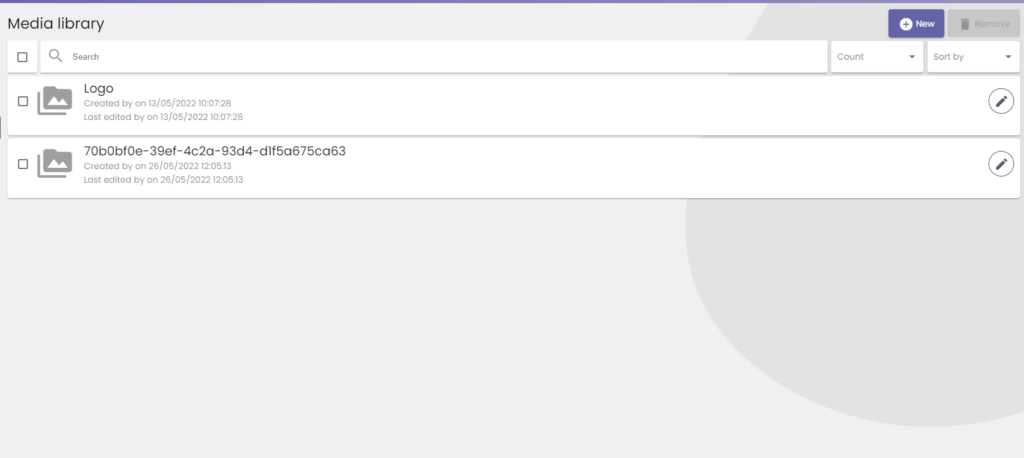
Head over to the media library in the backoffice application, you can see your image has been added to the list:
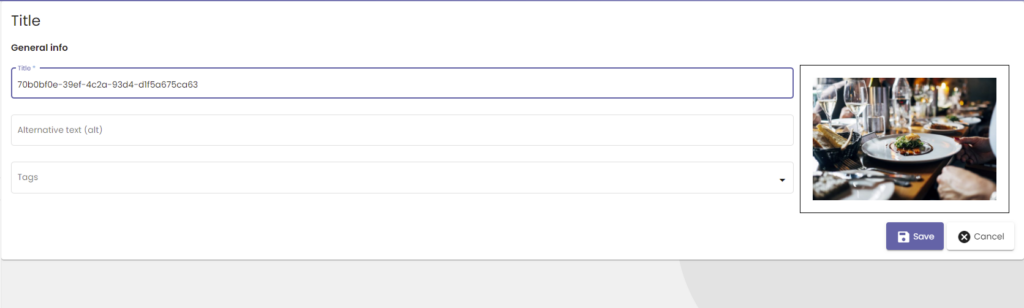
Your image has received a random name, but that’s not a problem you can edit that either in the media library or later by automating it (of course without writing a single line of code).
That was easy right!? Of course your image is merely uploaded to the media library for now. It is not linked to any data at the moment which means we cannot use it at for anything other than finding it in your media library. Not quite useful now, lets change that!
Linking the images to restaurant data
You might want to link your images to data. In our case we want to link our images to the restaurant data we create within our application. If we do this we can use these images later on to show on a restaurant review page for example. Linking images is pretty simple, lets dive in!
First we will need to create a new field in our Restaurant dataformat to contain all images linked to the restaurant we create. Head over to the Restaurant dataformat and add a field to the json schema:
As you can see we’ve added a new field “images” that is of type “array” and has items of type “string”. We will use this field to store the media_id’s of the uploaded images.
Head over to your “add images” page in the template-editor. If you select the uploader component you can define actions to be taken after an upload occurs:
Create one called “Add image to restaurant”. Within the action editor put together the function calls using the function picker:
Get data
Add to list
Update json
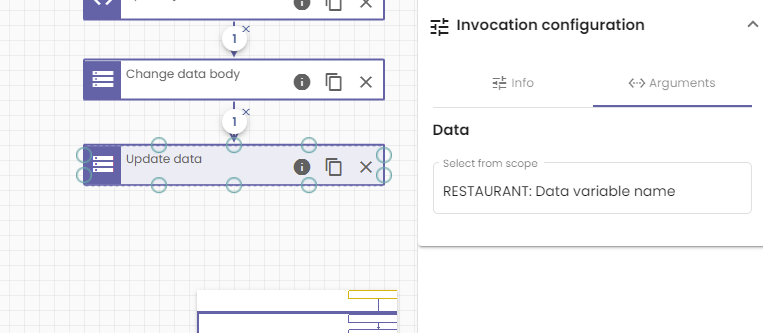
Change databody
Update data
Link them up like so:
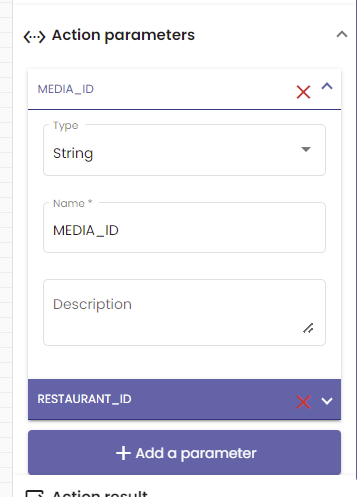
Actions executed within a certain template will always receive parameters passed to that template. Actions executed by a certain trigger can also receive certain parameters. The on upload trigger always passes the “MEDIA_ID” to the action that is being executed by the trigger. You still have to declare those parameters in your action but they will be passed automatically. For this usecase we need the MEDIA_ID and the RESTAURANT_ID, because we want to link the uploaded media to the restaurant data.
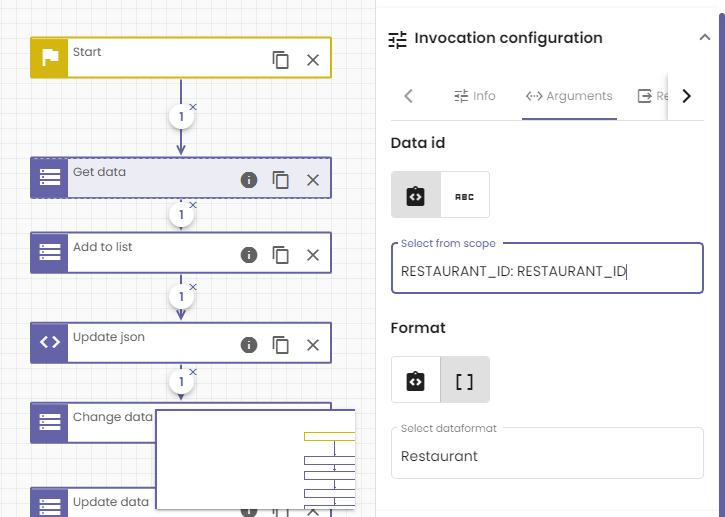
From this point on you will be able to use these parameters within this action. Lets go ahead and start with our “get data” function call. Select this call and edit the arguments. Select the “RESTAURANT_ID” as the “data id” and select “Restaurant” from the dropdown list as your dataformat.
Now this function call will lookup the correct restaurant data and load it into memory for use within this action.
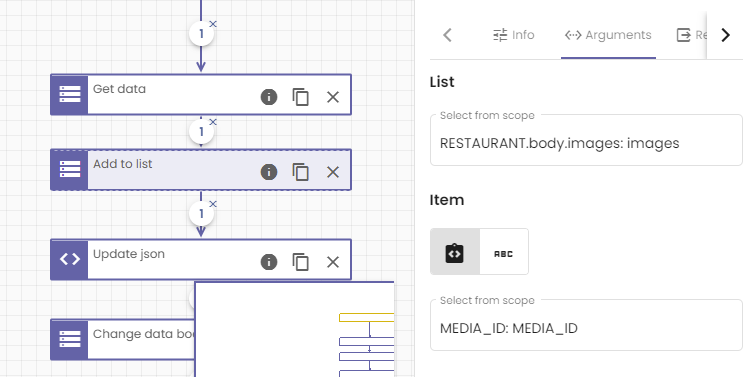
Next we will add the MEDIA_ID to the list of images we defined in the restaurant dataformat. We can do this by configuring the “Add to list” function call. Select the images field from our restaurant body as the list and select the “MEDIA_ID” as the item to be added to the list. Don’t forget to add the name of the resulting list, we’ve chosen “RESTAURANT_IMAGES” for this.
This function call will take whatever is in the images field of your restaurant data and add the new media_id to it. This will create a new list and it will be added to the memory for later use in this action. This new list can be accessed by using the name you provided for the result of this call (in our case RESTAURANT_IMAGES).
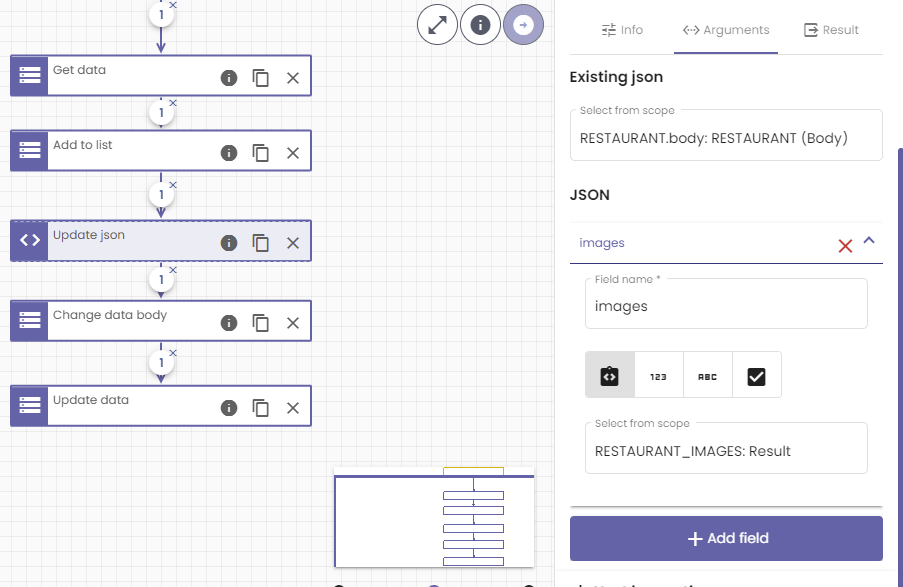
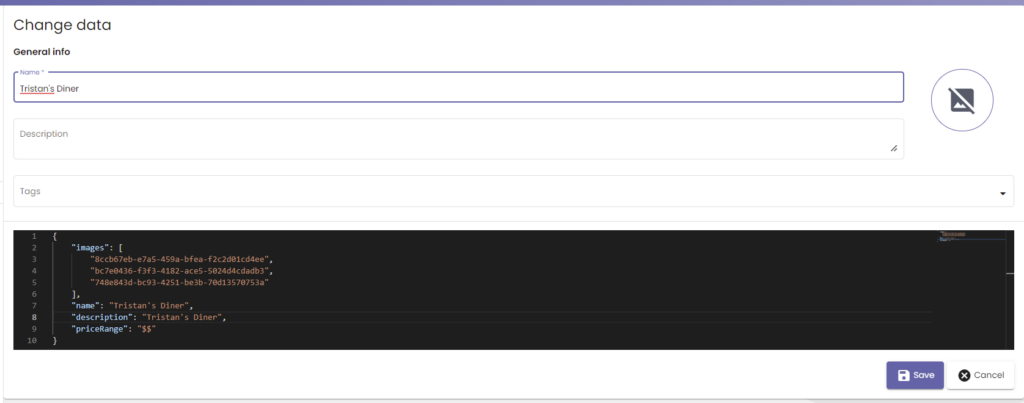
The next step is to create a new body of the restaurant data containing all the old data and the new list of images. We can do this with the “Update json” call.
This call will take the “existing json” and update the field images with a new value. It will then write the new json in memory for later use in this action. In this case we chose the body of the restaurant data as “existing json” and the new list “RESTAURANT_IMAGES” as the new value of the “images” field. We chose “RESTAURANT_BODY” as the result for this function call.
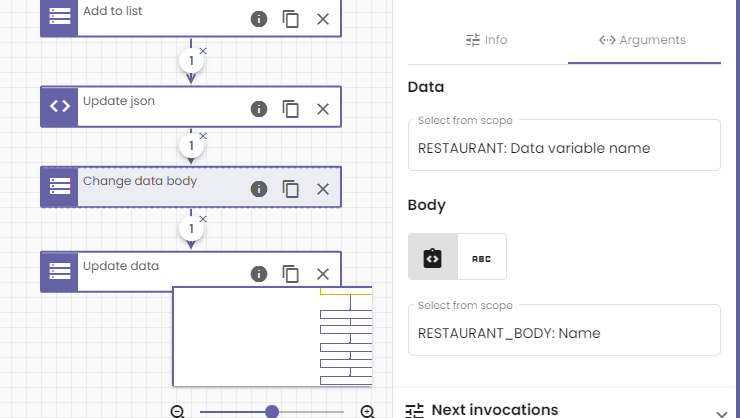
The next function calls are all about updating the actual data. First we write the generated “RESTAURANT_BODY” to the actual body of the currently held restaurant data and next we save the data in the database.
Above we chose “RESTAURANT” as the data which we would like to change and we chose “RESTAURANT_BODY” as the new body of this data. Of course at that point this data is only changed in memory, if we do not save it to the database, our changes will be lost forever once this actions stops executing. That’s why we call “Update data”
This is pretty simple, we just indicate the data we would like to save to the database is “RESTAURANT”.
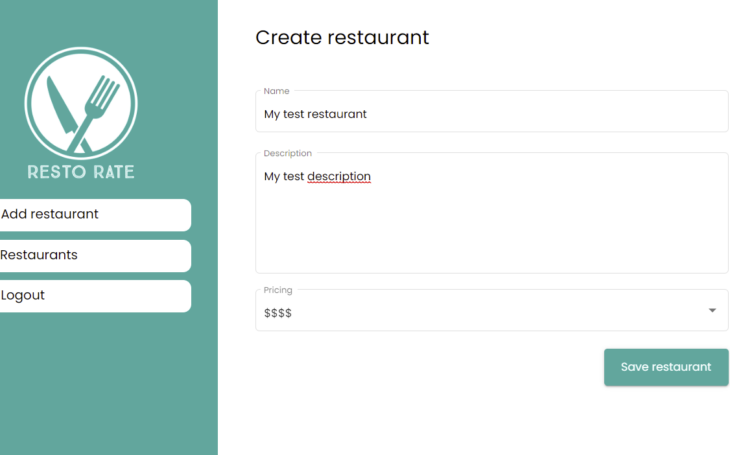
Before we start testing there is one final thing we should do. We have to make sure anyone who adds a restaurant has the opportunity to add a couple of images for this restaurant next. So after adding a restaurant we redirect to our “add images” page. So in the action we added in “Creating restaurants” we now add a single function call to route to our new page:
This is a simple route to another page where we select which page (which template) and provide the values of the parameters this template accepts. Being the restaurant name and restaurant id of the restaurant just created within this action.
The big test!
Okay, time for the big test! Head over to the “create restaurant” page and add a restaurant. When you click “Save” you will be redirected to our “add images” page, where you can upload some images. After uploading some images you will notice them appearing in the media library and after opening the data of the created restaurant you will notice the id’s of these images added to the “images” field:
Mind blown? Can’t wait to test? Or do you have valuable feedback? Please don’t hesitate to contact us!