In this series we will learn how to build a restaurant reviewing application using the NoCode-X platform. Our application will allow users to add new restaurants and leave ratings and comments about them. In the first part we will create all the functionalities for users to add restaurants.
This will cover:
Creating a new NoCode application.
Creating a master template for all our nocode pages.
Creating an initial navigation & logo.
Creating a restaurant dataformat.
Creating a restaurant form.
Creating the restaurant data.
Creating a new no code application
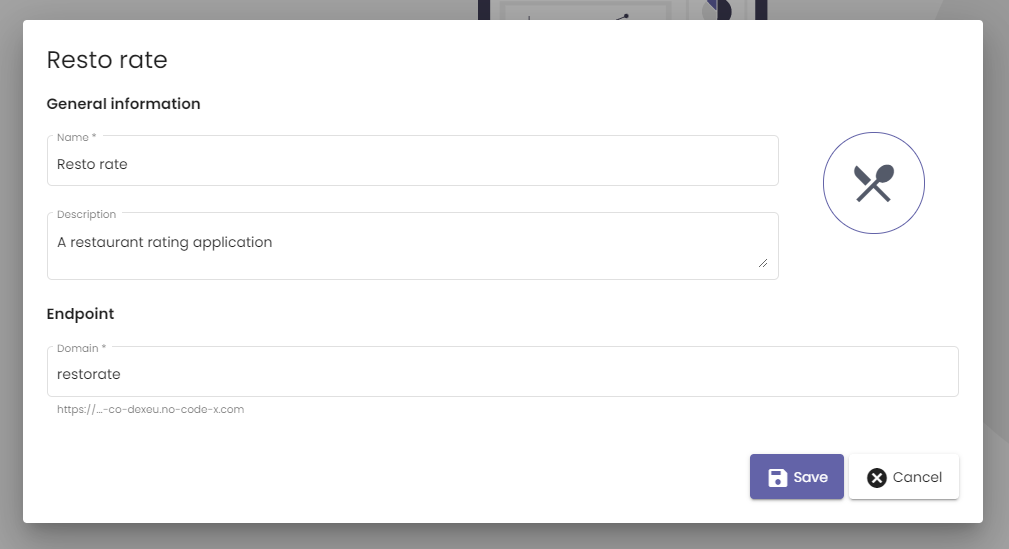
Start by logging in to your account in the backoffice application. If you do not have an account yet, learn here how to create one. Once you are logged in NoCode-X you will see a popup mentioning that you do not have any applications within NoCode-X for your organization. If you click “Create your first application” you will be able to create an application in the following screen. Alternatively if you did already create applications in the past, you can use the “application selector” > “Create new application” which will get you to the same screen.
On this screen we can choose:
An application name: Choose a descriptive name, that you and other application developers will recognize
A description: Add some information about the application that explains what exactly it does.
An icon: Choose an icon that helps you recognize the application fast
An application endpoint: choose the endpoint from which your application will be accessible.
After a correct input we can save and the application will be created and selected.
Creating a master template for all our no code pages
An application usually has several components that return on each page for example the logo or the navigation component.
In this step we will create a master template containing just those components. We will then create all pages within this application based on this master template. By doing so it will be much easier to maintain those reaccuring components in the future. Whenever one of those has to change we only have to change it in the master template afterwhich those changes are automatically propagated within the other pages.
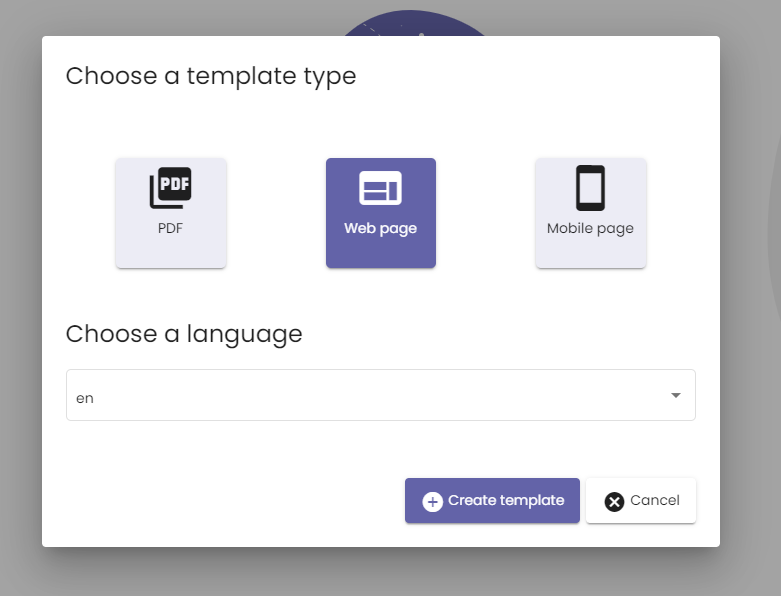
Simply start by navigating to the “template” section of NoCode-X and click “New” in the topleft corner. You are presented with a choice towards template type and language, for now we choose “Web page” and language = “en”.
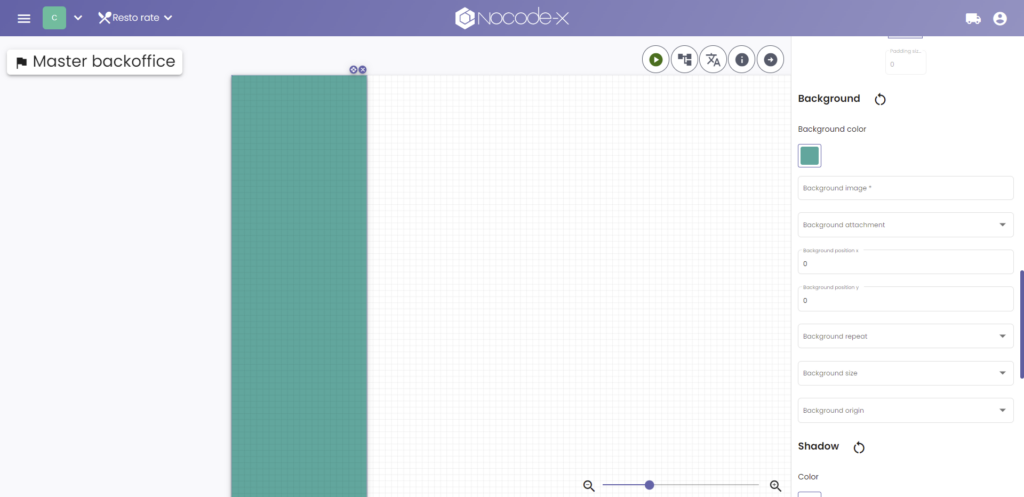
You arrive at the template editor. All changes to templates are done within the template editor. It is explained thoroughly in our documentation. We change the name of the template to “Master backoffice” and choose an icon that helps us recognize this template fast!
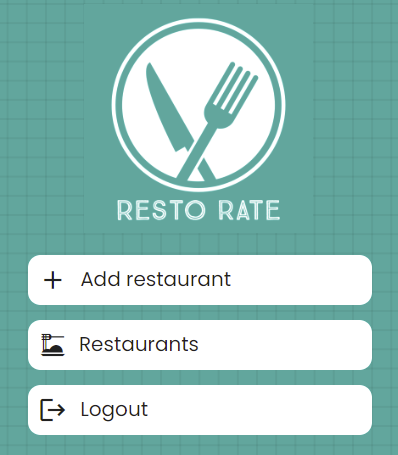
Initial navigation & logo
Typically the navigation and logo are components that return within each page of an application. That’s why we want to add them to our Master template. Navigate to the template editor of the Master template (where you ended in the last step).
Lets start by adding a “plane” component which we can use to define sections within pages. We use this one to define our left navigation. Add it to the page and add sizing & styling as you wish.
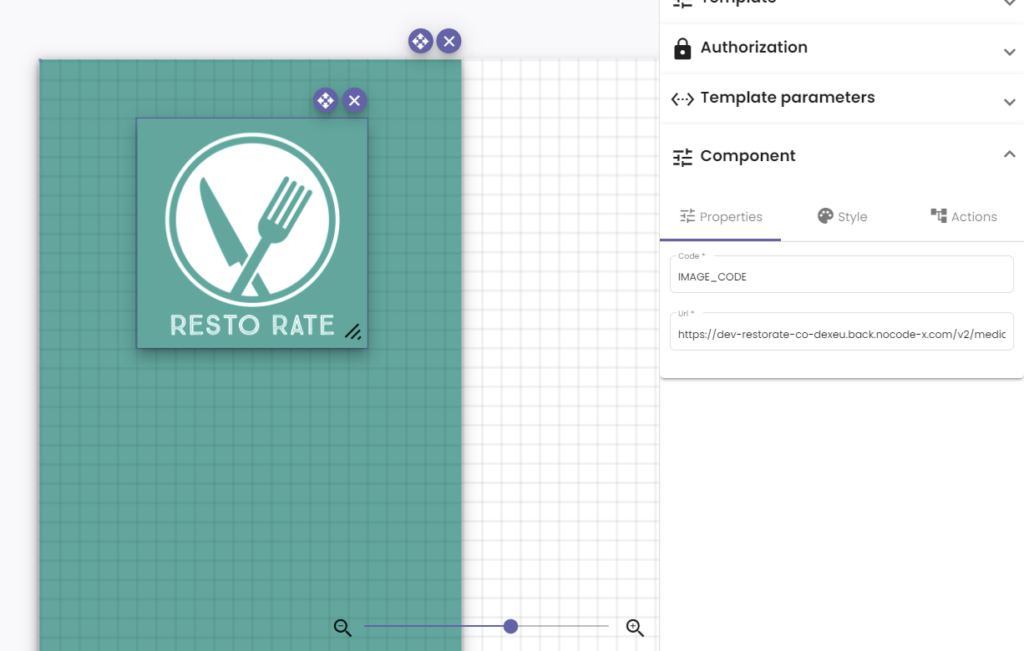
Once you have your plane in place, we can add a logo to it. We can do this by dropping an image component right in to that plane component. Use the “components” toolbar and search for “Image” afterwhich you drag and drop your image into place. Dropped it incorrectly? No worries, you can always adjust later by dragging or resizing. Once you’ve dropped in into the plane, you will notice that the image component will move together whenever the plane component is moved, as if it were part of it.
Now that we have an image component into place we need to link an image. For this you can choose to pick one from the built-in media library or you can just refer to an url on which the logo resides. For the sake of this tutorial we choose the latter:
We can simply add the url in the “Component information” toolbar by selecting the component (clicking on it) and filling in the url.
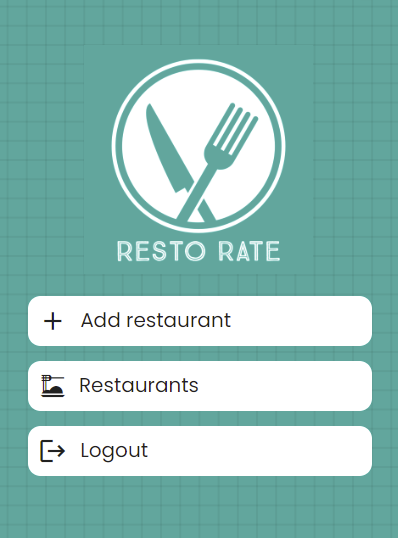
Now that we have our logo into place we can focus on adding our navigation. For now our navigation will consist out of 3 links:
Add restaurant
Restaurant overview
Logout
There are several ways of creating navigations within NoCode-X, all with there own benefits and drawbacks. For this application we choose to wrap our navigation in a vertical list which will make it easier for us to play around with positioning and resizing. Start by dragging a “vertical list component” on our navigational plane. Now you can add component to this vertical list just like you added the image to the plane, by dragging and dropping them on top of the vertical list.
Next we will create buttons by adding 3 title horizontal list components to this vertical list and for each of those add 1 icon component and 1 title component. Choose icon’s for each and add text to accordingly.
You can play around with the styling options as you wish. We’ve chosen to have a plain white background on the horizontal list components with a border radius of 10 to make rounded corners. We’ve also added a “on hover” dark green background with white text color, to distinguish buttons when hovered over. You can change cursor styles, change font’s, add borders, etc… Whatever floats your boat!
Now that we have our navigation into place (or at least the look) we can continue to creating restaurant data. We will continue our work on the navigation once we have page’s to navigate to.
Creating a restaurant data format
Now that we have our master template in place we can start to think about our restaurant data. In later tutorials we will want to visualize some data about a certain restaurant and allow users to comment and review that restaurant. But for the sake of this tutorial the following information will do:
Name
Description
Pricing range
Navigate to the data-format section of the backoffice and click on “New”
You will be presented with a form in which you can fill in de dataformat. On this page you have 3 tabs. For now lets focus on the first 2:
General information
An data format name: Choose a descriptive name, that you and other application developers will recognize
A description: Add some information about the data format that explains what exactly it is.
An icon: Choose an icon that helps you recognize the dataformat fast
Tags: You can add all kinds of tags to help you find this data-format at a later point, more about that in other tutorials
Format
This is where you can determine the actual format of the data. For this we use the JSON-Schema vocabulary. More information on this format can be found here and in the official json-schema documentation
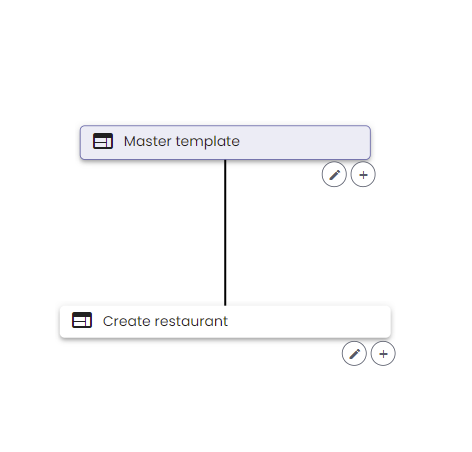
Next we need to create a user interface that will allow the creation of a new restaurant. Head over to your master template and click on the “hierarchy” icon.
This will open up a tree representing all templates that either are ancestors or inherit from the currently opened template. From this tree you can add children to your template by clicking the “+” icon afterwhich you can edit your new page by clicking the pencil icon.
As you might have noticed, the navigation we created on the master template is immediatly reflected within this page. Every change on the master template will propagate instantly to this page so there is no need to adjust your navigation on every page it will automatically be adjusted on each child of the master template.
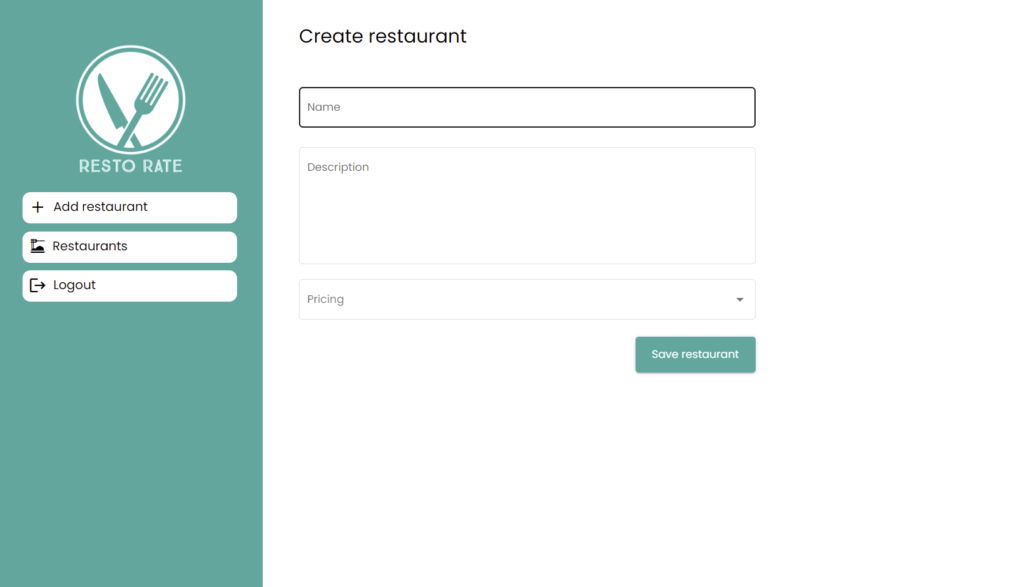
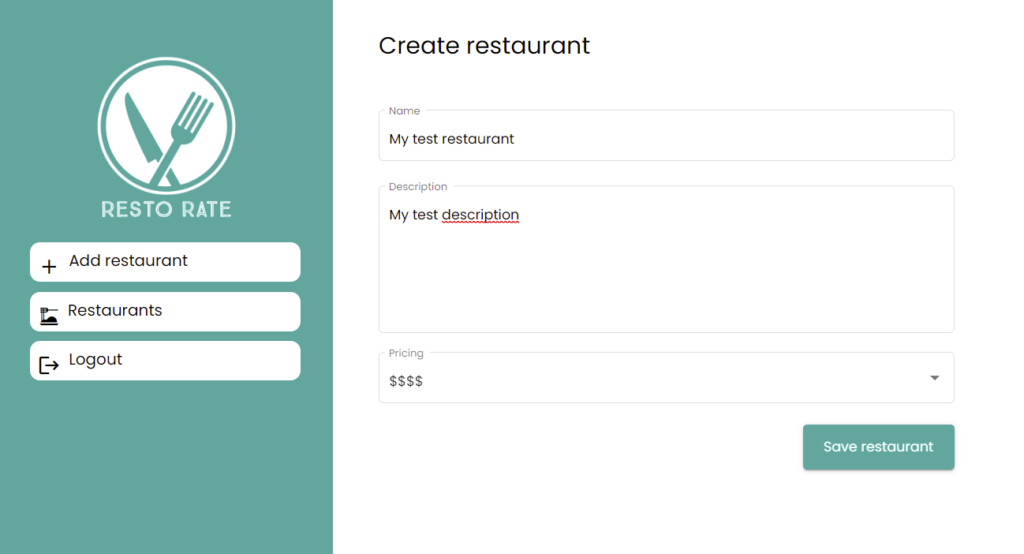
Lets start to create our restaurant form, add the following components to your page:
Title
Input component
Text component
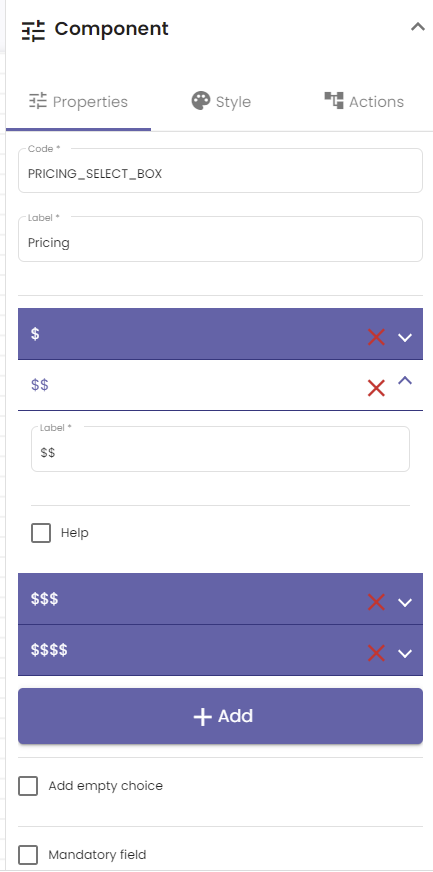
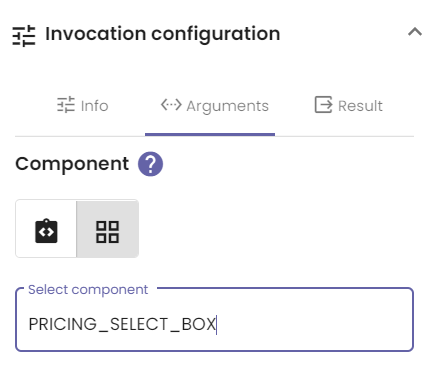
Select box component
Button
Make sure you add a descriptive code and label to each of those components.
Add some options to the select box component by clicking it and altering its properties:
Now its time to preview our application by clicking the green preview button located on the top right corner of the template-editor.
A nice and simple web application page created in a matter of minutes!
Creating restaurant data
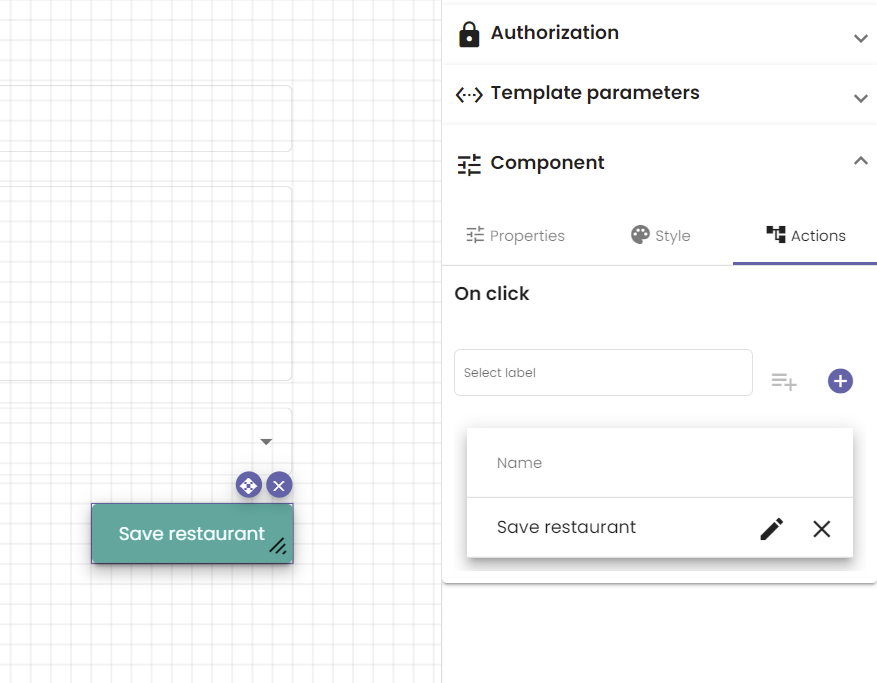
Now it is time to make our form actually do something. We can easily define actions whenever a button in clicked by selecting the button in the nocode template-editor and adding actions underneath “component”. We only need one action in this case “Save restaurant”
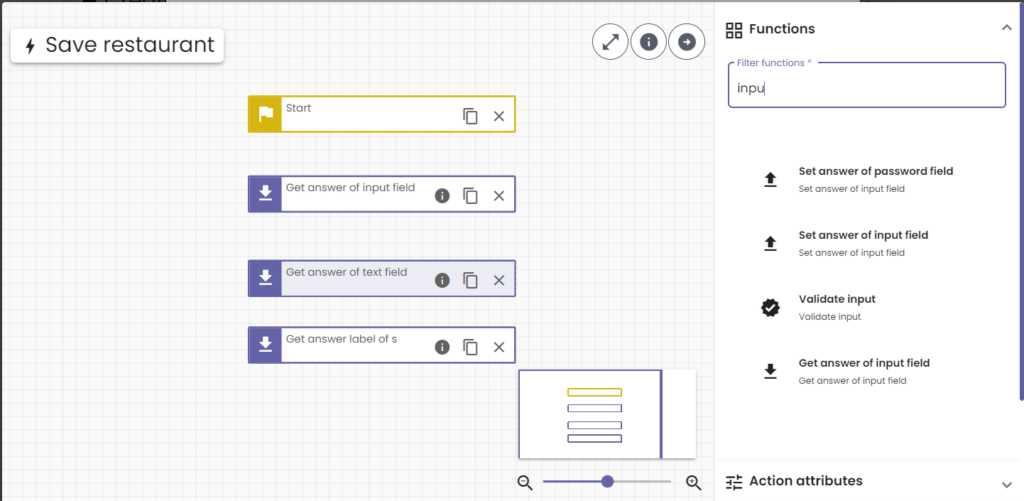
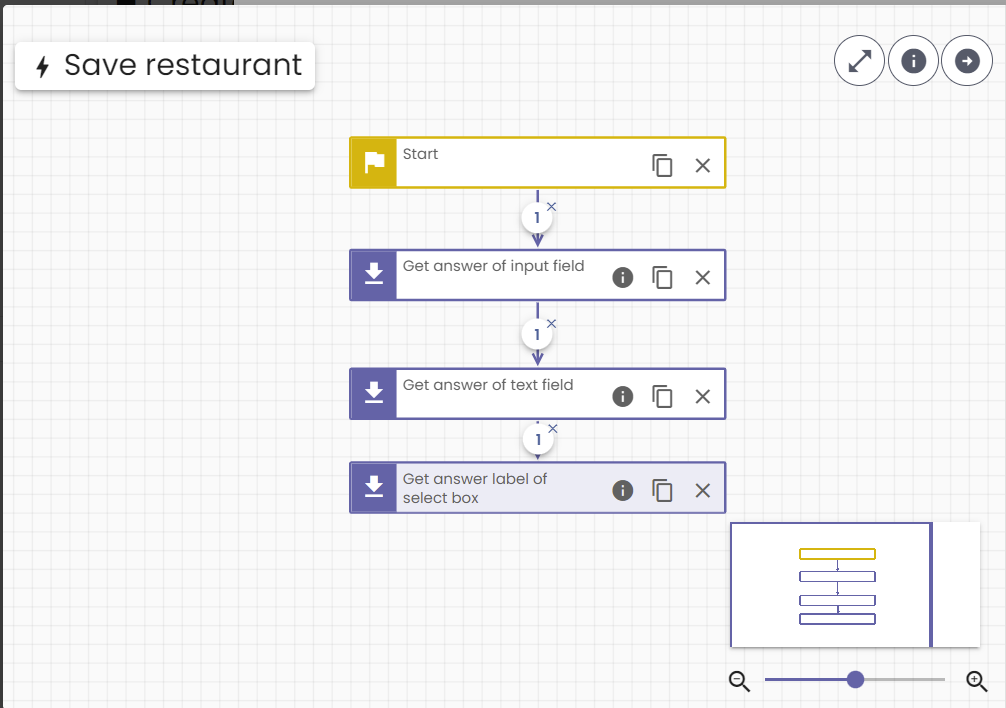
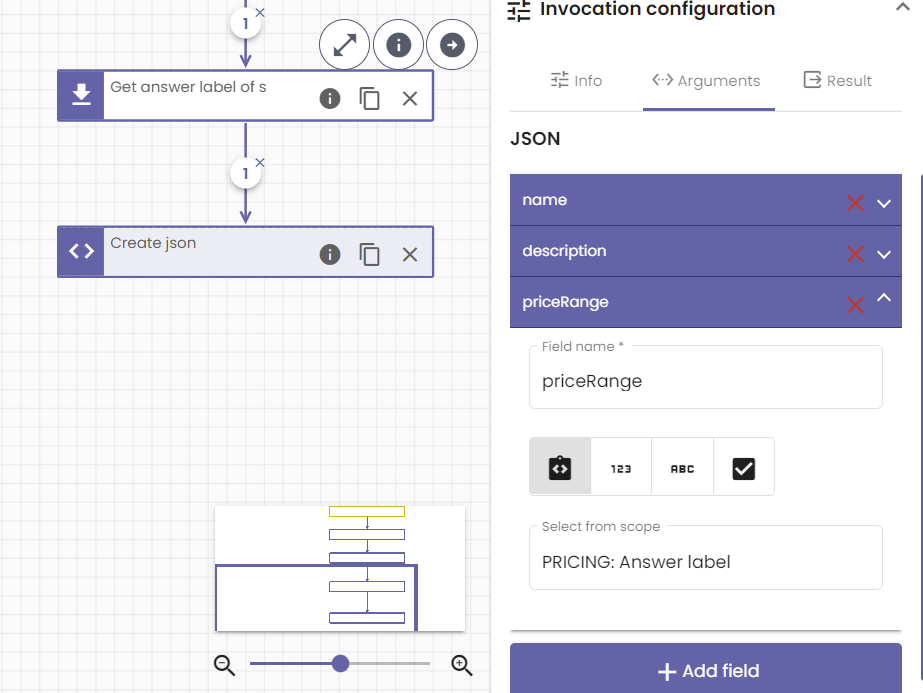
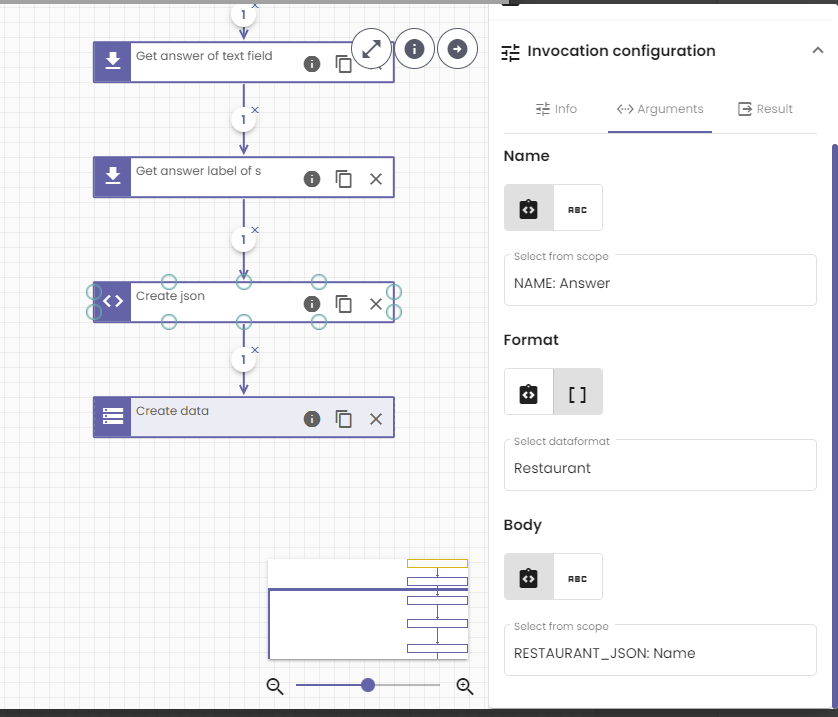
Adding an action will automatically open up the nocode action-editor. This is where we define our logic. And again it is as easy as dragging and dropping building blocks into place. Start by adding the function calls to read the data from your form by using the function picker:
Get answer of input field
Get answer of text field
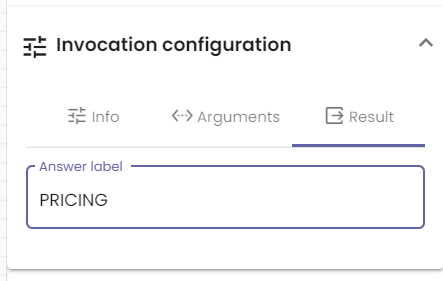
Get answer of select box
connect them to determine the sequence of execution, like so:
For each of those we will have to select exactly which component we want to read and in which variable we want to store the answer (result):
Make sure to pick a describing result variable name. This will help you recognize this variable in later steps.
All data within NoCode-X is resembled by JSON, therefore if we want to create restaurant date we will have to create a JSON file first. This is easily done by adding the “create json” function call and adding each JSON field in it. You can either pick the value from your variable scope or fill in a hard coded value, In this case we will pick one from our variable scope. Make sure your JSON fields match the fields defined in your JSON Schema of the Restaurant dataformat.
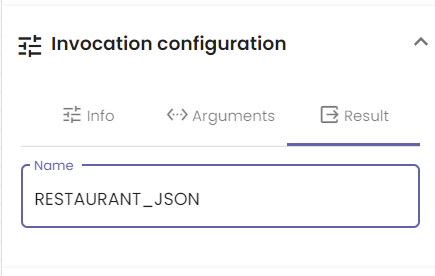
Make sure to choose a descriptive name for your JSON variable.
All we have to do now is to create data based on your restaurant data format. For this you can drag a “create data” function call on screen.
Choose a name for your data, in this tutorial we have chosen to use whatever is filled in the “name” input field of the form. It is of course a data based on the “restaurant” dataformat containing a body which we’ve selected from our scope (The one that we created using the create json function call).
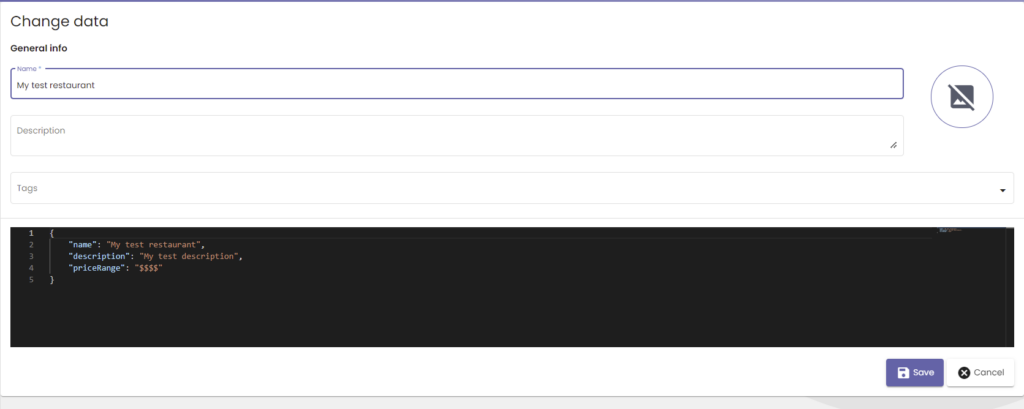
Time to test our application, click on the preview button on the nocode template-editor. Fill in the form and click “Save restaurant”
Nothing happens? No worries, all according to plan! We haven’t defined what should happen after a save yet so the application won’t do anything for now. However when we go into the “data” section of the backoffice we see a new data entry was created with the name “My test restaurant” and when we open it, it contains all the data we added in the form.
Cool huh?! In the next tutorial we will show you how to show a success message upon creating a new restaurant and how to create an overview page containing all restaurants in your application.
Interested in more information or can’t wait to start building your own application? Do not hesitate to contact us!