Ah yes, another part in the story of our “DeskSculpt Inc.” office rental application. Let’s continue our work from the previous tutorial. If for some reason you haven’t completed the previous tutorials we encourage you to do so. If however you want to start with this tutorial, no problem you can easily get the resulting application of the previous tutorial from “The Hub” by installing “NoCode-Xcelerate #4”.
In this tutorial we will send a mail to our users mentioning that we have received their booking and we are working on it. We will do so by leveraging an existing integration available on “The Hub“: “Mailjet integration“. Remember that all the integrations on “The Hub” were created by using NoCode-X so communication with any other Third party tool by API possible to build & reuse within NoCode-X.
Hey Ho, lets go!
First thing to do is to install the “Mailjet integration” plugin from “The Hub“, so head over there and start the installation. If you don’t have a mailjet account you can create one here: https://www.mailjet.com/. In order to authenticate with the Mailjet API you will need an API key, how to create those is eplained here: “What are API Keys“. Once you have your mailjet account setup & API key, we can proceed.
The mailjet integration comes with a data-format named “Mailjet configuration” amongst other global settings it allows you to save your API key & Secret.
Open up the “Data overview” and create data by clicking on “Create“.
Name the data “Mailjet configuration” and choose “Mailjet configuration” as data-format.
Choose “Development” as your environment. (If you wish to use Mailjet in other environments you will have to create other mailjet configuration data entries. This allows you to cleanly seperate all environments).
Provide your API key & Secret as in the code snippet below
{
    "api_key": "{{REPLACE WITH YOUR OWN API KEY}}",
    "secret_key": "{{REPLACE WITH YOUR OWN SECRET}}"
}
These are secrets, and thus demand the necessary caution when storing them. Generally storing secrets in plaintext in a database is a very bad idea. If one were to do so it leaves a door wide open to hackers. Luckily NoCode-X makes it extremely easy to store secrets and other confidential data in a secure manner. Lets take a look at how our mailjet configuration is secured:
Head over to the “Data-format” overview and find “Mailjet configuration”
Open up the “Format” tab and open up “api_key”
As you can see, there is a field “Data classification” and it is set at “secret“.
This data classification causes NoCode-X to automatically encrypt the data stored in this field. Moreover it is encrypted at application level, meaning that if hackers ever gain access to your database they only have the encrypted values, without the possibility to decrypt. In effect your secrets are safely stored. If you wish to know more read our article on “automatic encryption of data at rest within NoCode-X“
Encryption is not the only thing that NoCode-X takes care of. It is a security best practice and sometimes even legally required to keep an audit trail of access to sensitive data. Every read/write access to data flagged as confidential / medical or secret will be logged in the built-in audit log of NoCode-X. This can be accessed by using the “Logs” link in the side navigation.
Note that audit logs are being kept when data is accessed/changed by using the NoCode-X editor or by means of an application built with the NoCode-X platform. So no access/change is being forgotten.
That’s all there is to configuring your application to send mails via Mailjet. All you have to do now is send the mail at the correct moment. In our case we want to send a mail when a user creates a reservation. In tutorial #4 we created a form which users can use to create a reservation. One posibility would be to send the mail in the processing logic of this form. That would definitely work but it might not be the best solution. While creating applications that should remain as maintainable as possible we might want to decouple the logic of creating a reservation with whatever should happen as a result of this event. This is often referred to “Loose coupling” which is already a best practice in traditional development and now finds its way to no-code development with NoCode-X.
Every Data-format has 3 triggers for which we can link actions;
After creation of data
After update of data
After removal data
By the names of these triggers it is clear when these triggers will be triggered and thus execute the logic of the actions linked to them. For our usecase we will need to link an action to the “After creation of data” trigger of the “Reservation” data-format.
Head over to the “Data-format” overview and open up the “Reservation” data-format
Open the “Actions” tab and open the “After creation of data” section
Add an action to this section by clicking the “+” button and click the “pencil” button to edit.
Give your new action a descriptive name “Send reservation mail“.
Open up the “Functions” section in the “Tool pane” and find the “Execute action” function.
Drag and drop this into your action and hook it up with the start block
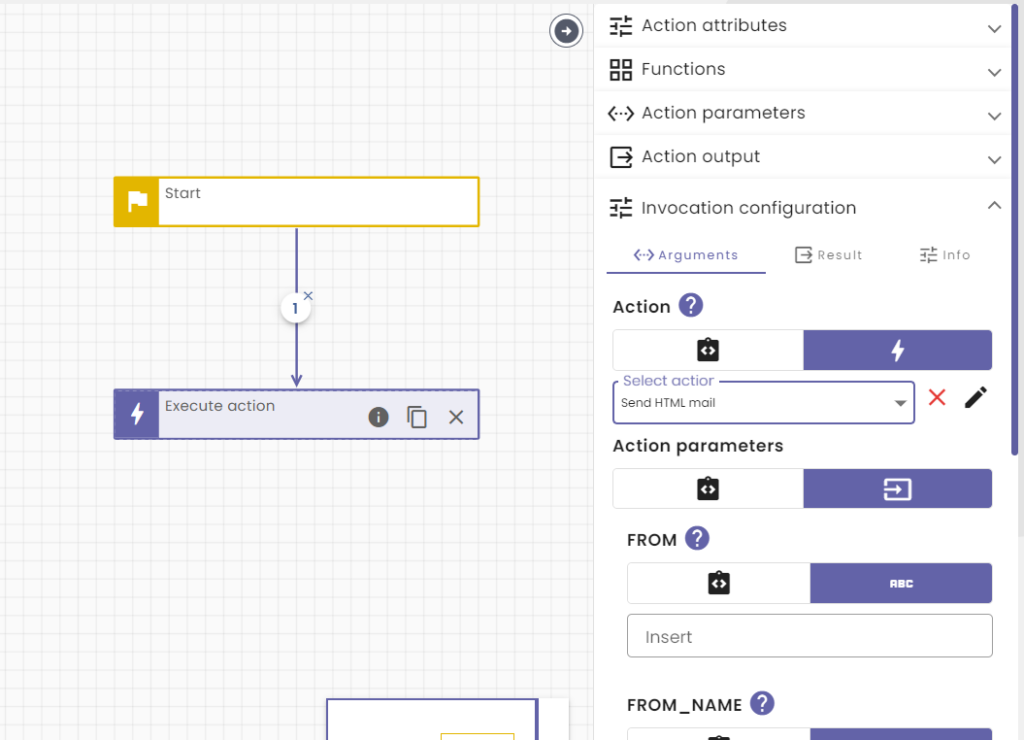
Make sure you’ve selected the “Execute action” block and open up the “Invocation configuration” in the “Tool pane“.
As Action, search and select “Send HTML mail“
The Mailjet integration plugin offers you 2 actions: Send HTML mail and Send template mail. The first allows you to just send a mail by sending the HTML of the mail as a parameter with the action. The “Send template mail” action allows you to send a mail that uses a mailjet template which you can create within mailjet itself. For this tutorial we will simply use “Send HTML mail”.
All we have to do, to send our mail is to provide this action with the necessary values for its parameters. Now within NoCode-X every action that is called as a result of a create/update/remove of data (meaning an action that is linked to these triggers) will be able to receive the data in question as a parameter. The only thing we have to do is create a parameter with the name “data” and of course the correct type and data-format.
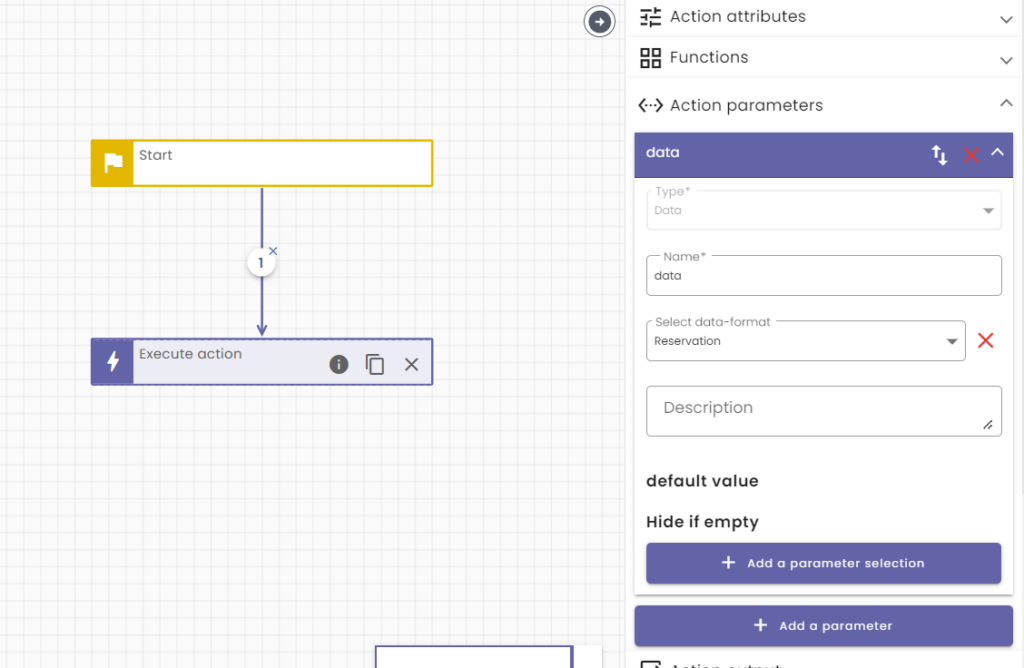
Open up the “Action parameters” in the “Tool pane“
Add a parameter called “data“
Choose “Data” as type
Choose “Reservation” as “Data-format“
Okay all that’s left is to pass the correct parameters with the “Send HTML mail” action.
Select the “Execute action” block and make sure that the “Invocation configuration” is open
Set value of “FROM” to the mailadres you are allowed to sent emails from in mailjet (or else they will be blocked)
Set value of “FROM_NAME” to “DeskSculpt Inc.”
For the parameter “TO”, switch to the “Variable scope selector” and set the value to “data.body.email”.
For the parameter “TO_NAME“, switch to the “Variable scope selector” and set the value to “data.body.firstname”.
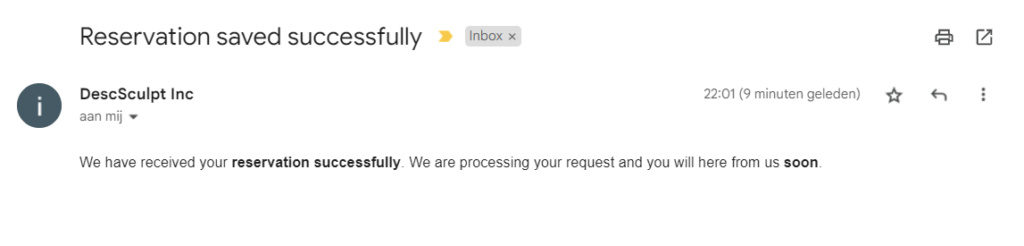
Set value of “SUBJECT” to “Reservation saved successfully”
Set value of “TEXT_PART” to “We have received your reservation successfully. We are processing your request and you will here from us soon.”
Set value of “HTML_PART” to the HTML below
<p>We have received your <strong>reservation successfully</strong>.
We are processing your request and you will here from
us <strong>soon</strong>.</p>
All there is left for us todo is test out if the integration has worked. Add an reservation using the DescSculpt Inc application and check your mailbox!
And just like that we have a nice integration with Mailjet! Our users now receive feedback by mail on their reservations.
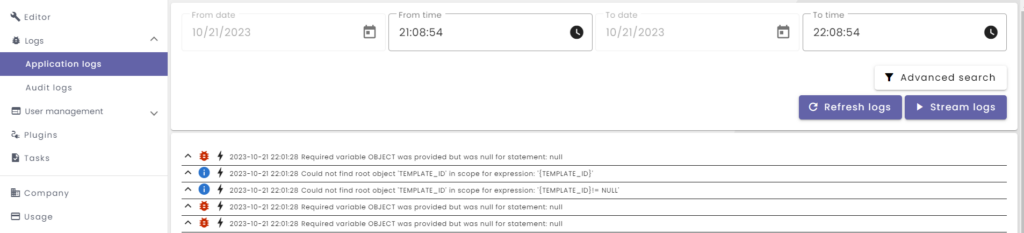
If for some reason your mail does not arive it could be that you’ve missed something in your no code, your credentials are incorrect or some other reason. You can always troubleshoot by checking your application logs. They can be found by using the left navigation Logs > Application logs.
These logs can give you an insight on what might be going wrong with your application. By clicking the lightning icon next to each message you are redirected to the action that generated the log message. If for debugging reasons you want to write some text to this log file yourself you can always use the function “Write to application log“.
Our application is starting to look and behave nicely, and we are only at tutorial 5! Care for more action? Check out: NoCode-Xcelerate: Creating a backoffice for our office rental application.
Did you notice that all plugins used within this tutorial were built by using NoCode-X? That’s right no code was used to build these plugins want to learn how to build plugins check out these tutorials: