


In this tutorial, we will embark on the exciting journey of creating our very first application within the innovative NoCode-X platform. Our project will feature a simple “Hello World” page, adorned with both a sleek toolbar and a convenient side navigation menu. With NoCode-X’s user-friendly interface and powerful capabilities, you’ll soon discover how effortlessly you can bring your app ideas to life without writing a single line of code. Let’s dive in and explore the limitless possibilities of no-code app development!
To begin, please navigate to https://app.nocode-x.com/. Here, you’ll encounter the login page. If you haven’t yet registered, you can easily do so. Alternatively, you can use your Facebook, Google, or LinkedIn credentials to log in. For the purpose of this tutorial, we’ll walk you through the steps of creating a new user account.
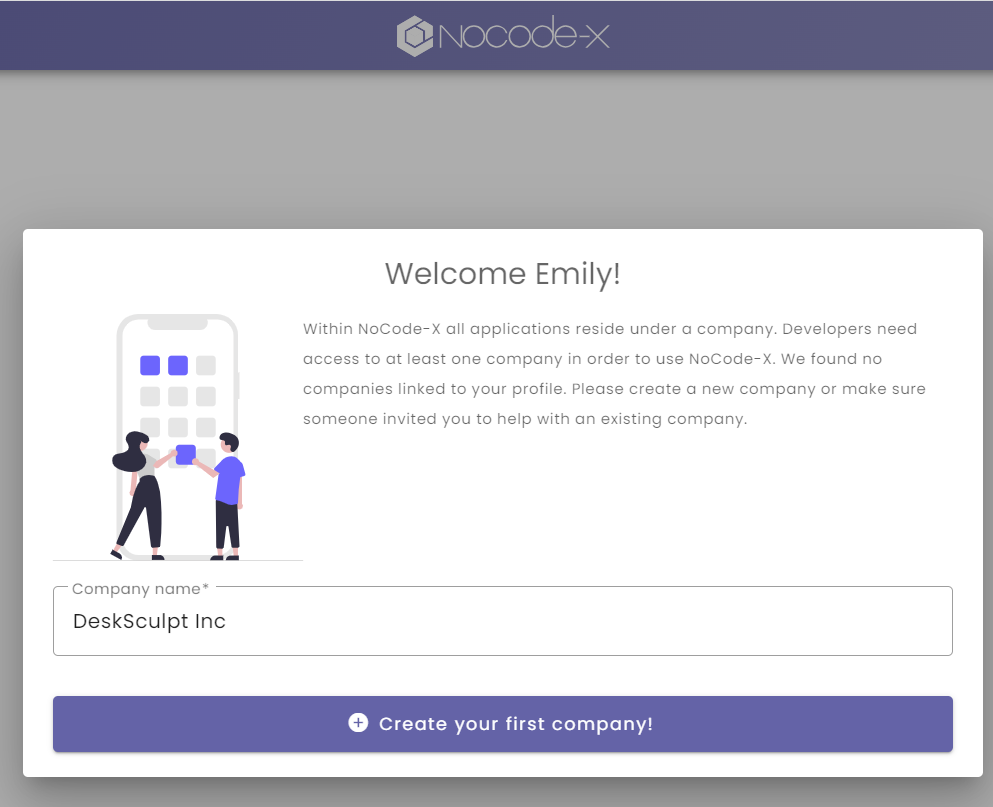
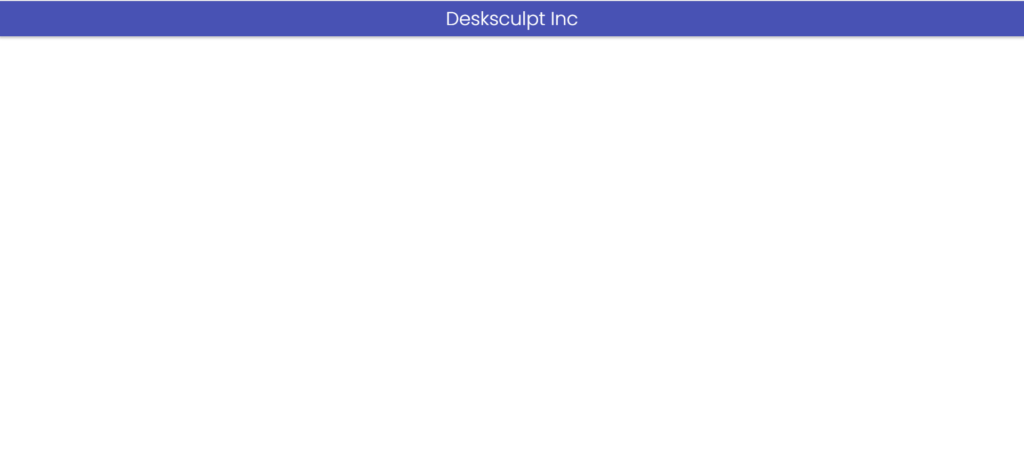
As first-time users, we are prompted to enter a company name. A company serves as an organizational unit encompassing one or more applications and a single subscription, among other things. After entering our company name, which in case of this tutorial is “DeskSculpt Inc” we can proceed to select the subscription plan that best suits our company’s needs.
Your subscription plan is vital as it determines the usage of your application. Think about the following significant aspects when picking a plan:
Since you’re fresh off the boat and have no applications under your company, NoCode-X makes it easy for you by prompting the creation process. Just click on “add a brand new application”
Customize your application:
And that’s it! You’re now ready to embark on your NoCode-X journey. Dive deep, explore, and let your imagination run wild. With NoCode-X, the possibilities are truly boundless.
Now, let’s proceed to build our first application. We start by creating a template which will resemble your page:
You’ll now see the template editor for your still yet empty template. We will now give this template a name and make sure our users can reach it without having to authenticate first.
NoCode-X focusses strongly on reusability of nocode logic / components. This enables us to easily combine existing solutions into a new application. These existing solutions can go from small building blocks to full blown applications that allow a high level of customization. That’s where NoCode-X differs from other no code platforms. It allows you to build your own building blocks without having to write code and use them across applications or even across companies. These building blocks reside in what we call “The Hub”. Each and every user has access to “The Hub” and can use it to install, update and even publish building blocks.
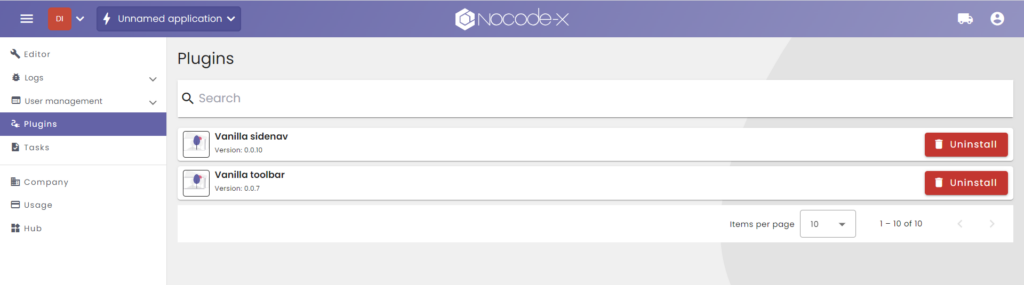
Once the installation is successful, you’ll have two plugins in your application. You can confirm this by visiting the plugins section by clicking on the plugins link in the sidenavigation, which provides an overview of all installed reusable plugins. You’ll also notice that the number of templates in the template overview has increased. Each plugin comprises a collection of templates and actions designed to provide a specific functionality.
It is now time to design your first webpage by placing a toolbar and a sidenavigation on it. We will start by implementing the toolbar.
The template component allows you to load another template as a piece of a bigger template. In essence it allows NoCode-X developers to reuse their templates as building blocks.
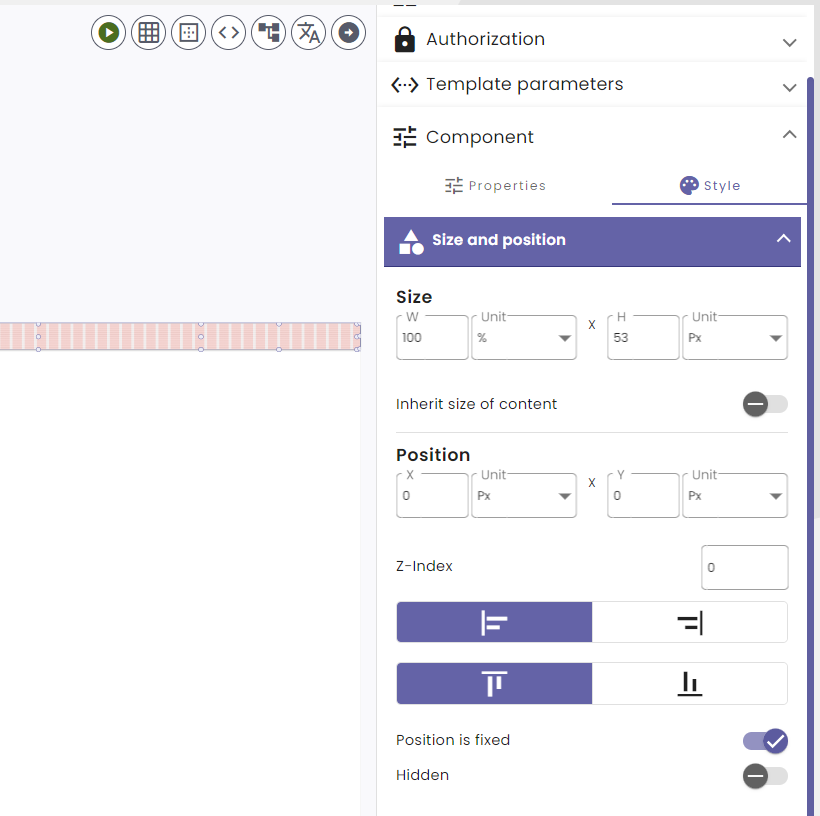
Within NoCode-X you can position all components for a specific screentype. This allows you to build so called “Responsive layouts”. We will leave this feature for another tutorial and just focus on building our page the same for all screentypes. Select “All screens” in the screentype picker
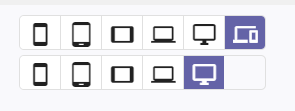
This selection makes sure you position each component the same for all screens. Once you’ve selected “All screens” you can use the lower row of buttons to change the screentype of the preview of the page. For each component you can define its position in numerous ways, we encourage you to read up on the documentation with regards to component sizing & positioning.
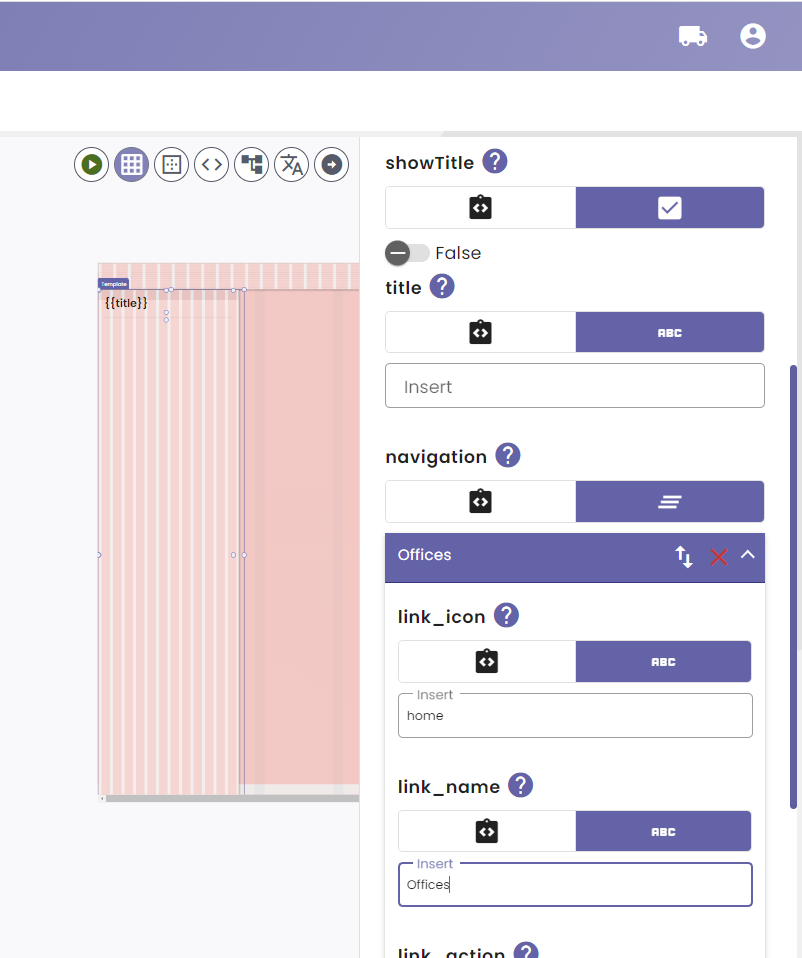
The “Vanilla toolbar” allows you to specify a title, left buttons and right buttons. For the sake of this tutorial we will limit ourselves to configuring the title.
If you like you can already preview your page by clicking the preview button: “
And the result:
Next, let’s provide a way for our users to navigate our application by adding a sidenavigation to our page.
Time to position our sidenavigation. For this application we want our sidenavigation to appear on the left side of the page. We want it to spread across the entire height of the page starting from where the toolbar ends. We also want it to scroll along with the user.
The “Vanilla sidenavigation” allows you to specify a title and some links in your navigation. For each link you will be able to specify a name, an icon, the logic that should be executed when it was clicked & the path on which this link should be visualized as being “active”.
Congratulations! You’ve now successfully set up a basic webpage with a top toolbar and sidebar navigation on the NoCode-X platform. Although our work is not done yet.
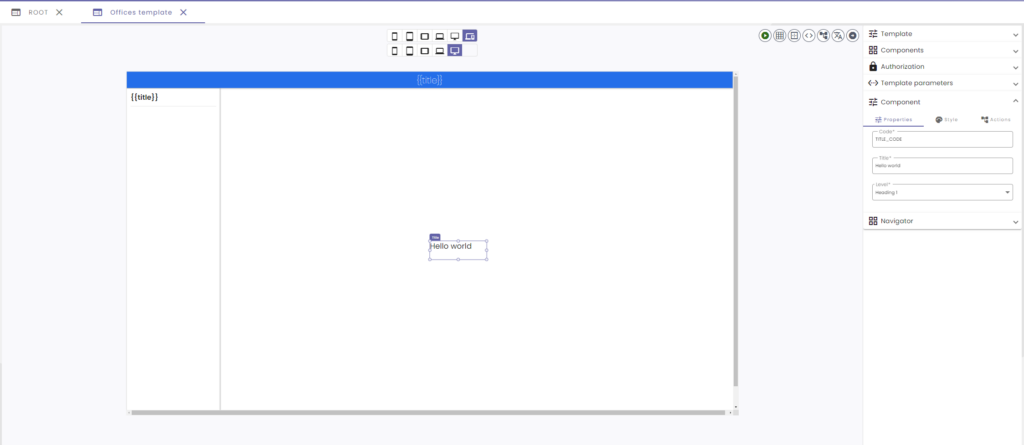
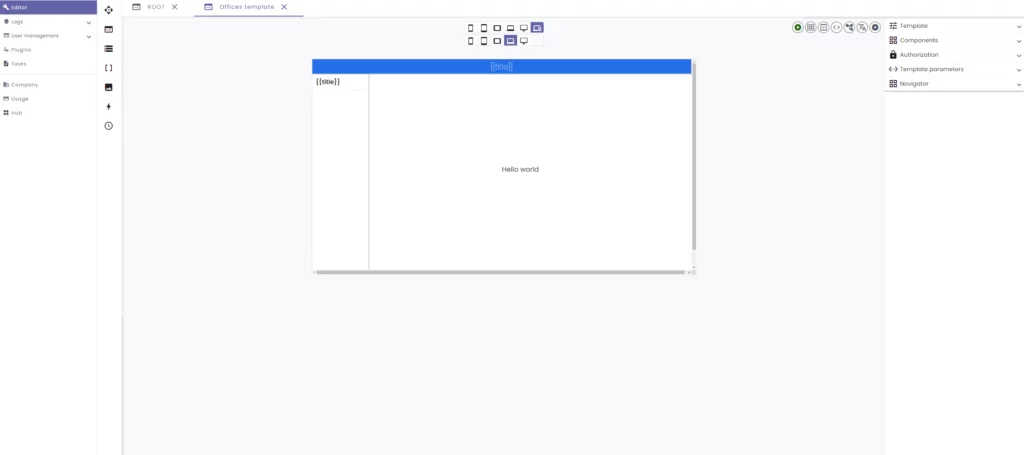
As mentioned before, NoCode-X focuses hard on reusability. It is nice that we can reuse components that have been built in NoCode-X like the sidenavigation and the toolbar but it would be a shame that we would have to repeat the above steps for every page within our application. That’s why we introduced “Template hierarchy“. With “Template hierarchy” you can create parent-child relationships between templates. Every child template will inherit the components and their settings from the parent. Lets use the template we have just created as the “ROOT” of our application and create a child to visualize a “Hello world” message.
As you can see this template also includes the sidenavigation and the toolbar. That’s the magic of “Template hierarchy” working! Now lets make some changes to our child template. Lets give it a good name and place our “Hello world” message.
We only have one thing left to do. The link in our sidenavigation should redirect the user of our application to our “Hello world” page. To do this we need to create an “Action“. Actions are sequences of no code functions that are executed by NoCode-X. We can easily put them together by dragging and dropping everything into place.
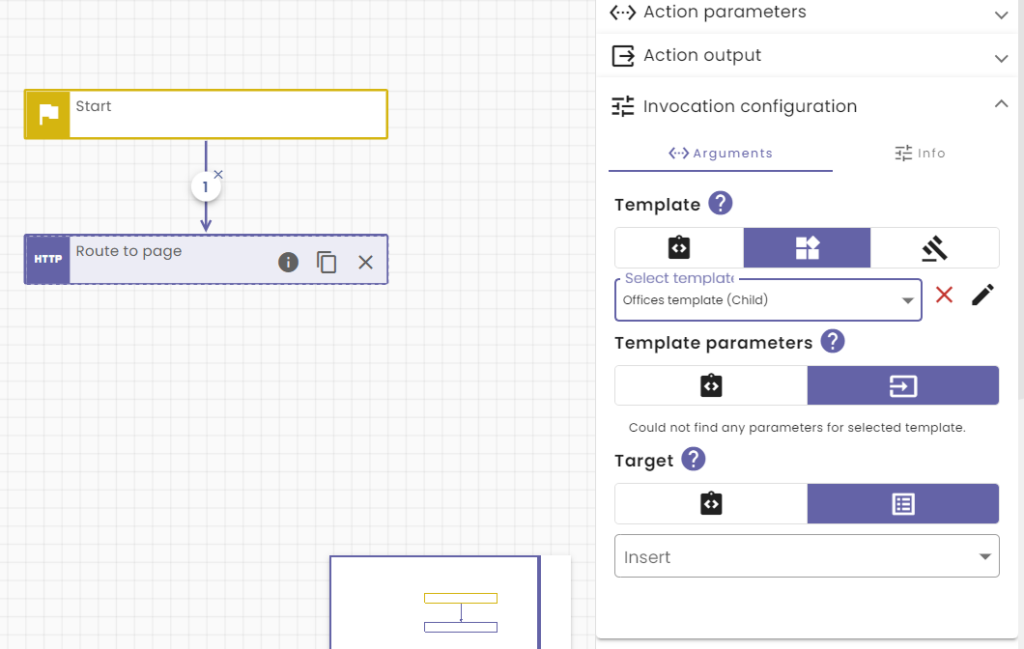
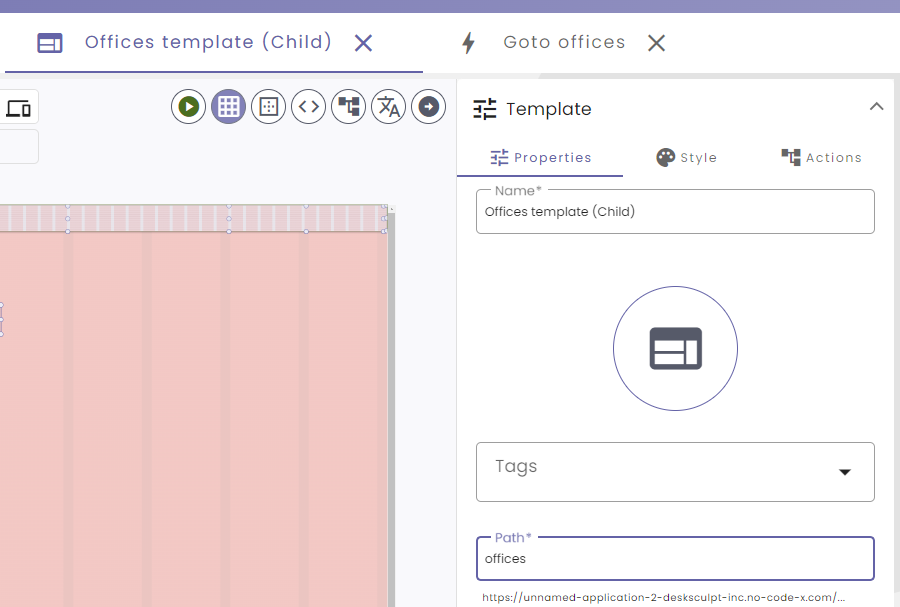
The last step is to indicate that this button should appear as active when the child template is displayed. Upon creating a template by default it receives a random text as a unique path. This is just to make sure this path is unique, you can change this to anything you want as long as it remains unique within your application. Lets head over to our “Offices template” and change the path to “offices”
In our sidenav there is a property we haven’t set yet: “link_active_path“. This feature checks the current URL for a certain pattern and displays our sidenav button as active when this pattern is detected. Lets change this to the path that we configured on our “Offices template” being “offices”.
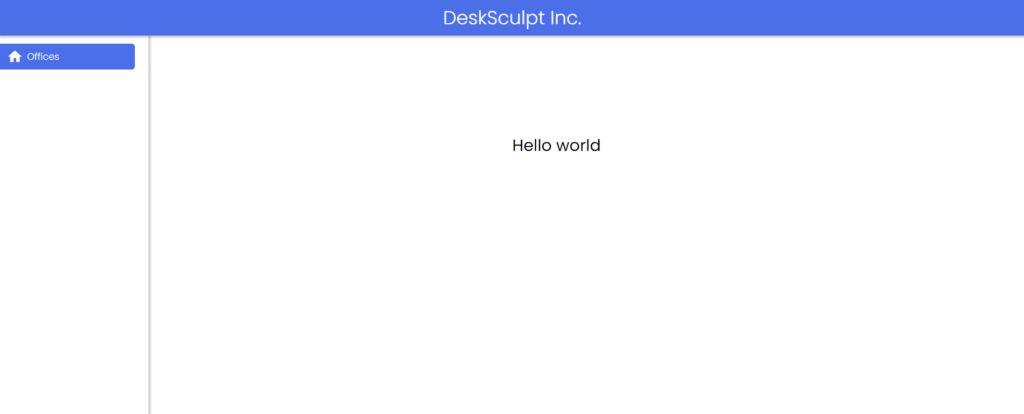
Done! Let’s preview the modifications made so far. If everything went well, you should now have a clickable button that displays the child page.
Great! That’s a good start. NoCode-X provides several environments for each application. It provides a development, test, accept & production environment that all run independently from eachother. They can potentially run different versions of an application and all have a seperate built-in database & user base. Let’s create our first version of our application.

Click on the truck button on the rightside of the NoCode-X toolbar and select “Create First Version”. We will enter a name and description for this version. Now hit the “Save” button. This version can now be promoted to your test, accept & production environment which will incur some optimizations & make them reachable at different endpoints. For example if your preview endpoint is: https://dev-rental-rental-inc.app.nocode-x.com/offices. Your test endpoint will be https://test-rental-rental-inc.app.nocode-x.com/offices, accept: https://accept-rental-rental-inc.app.nocode-x.com/offices & production: https://rental-rental-inc.app.nocode-x.com/offices
That’s it you’ve created your first Hello world application in NoCode-X! Care for more action? Check out the next tutorial: NoCode-Xcelerate: An overview of offices
Did you notice that all plugins used within this tutorial were built by using NoCode-X? That’s right no code was used to build these plugins want to learn how to build plugins check out these tutorials: